People are converting PSD to WordPress or shifting from other platforms for a variety of reasons. One of them is acquiring a productive and flexible e-commerce website. In this article, we are discussing the method to create and display WooCommerce custom fields. WooCommerce is one of the most popular plugins available on the CMS. It helps in easily adding an online store to any WordPress interface. In fact, the plugin is one of the most widely-used e-commerce solutions across the world. People can use the solution to sell all kinds of physical and digital products. It comes fitted with all the necessary features that are needed to create a virtual marketplace like shopping carts, inventory management, payment methods etc. Business owners enjoy the flexibility of displaying the usual product data like name, price, categories, tags, and dimensions. They can also add extra custom fields to provide additional information about their offerings. Let’s sess how such fields can be created and displayed by WordPress users.
Table of Contents
What Are WooCommerce Custom Fields?
Custom fields are the extra fields that can be appended to the “Add/Edit Product” page of a WooCommerce store. Many people feel that the pre-loaded fields are sufficient for an e-commerce interface. They are not completely incorrect but there are situations in which merchants feel the need of displaying additional data. For instance, custom fields can come in handy for showing a short-term offer or video-clips about an item. They can also be helpful in increasing customer engagement by showing customization options such as personalized gifts.
How To Create And Display WooCommerce Custom Fields?
The entire process of making and showing custom fields can be divided into two sections:
- Creating the custom fields in the website’s back end
- Showing the fields on a chosen page.
Following is the complete step by step procedure spread over the two sections:
A. Create WooCommerce Custom Fields
In this tutorial, we will first create the custom fields with the help of the steps given below.
Step 1: Install A Plugin
Adding a new feature or extending the functionality of a WordPress interface can be easily done with a plugin. We will also be using one to make additional fields on a WooCommerce product page. The Advanced Custom Fields plugin has been chosen for the purpose. Log in to the admin dashboard of your installation. Locate “Plugins” in the menu in the side panel and click on it. Go to “Add new” and enter the name of the plugin in the search box. When it appears in the results, click on it to download its files. Activate the plugin after it is successfully installed on your interface.
Step 2: Create A Field Group
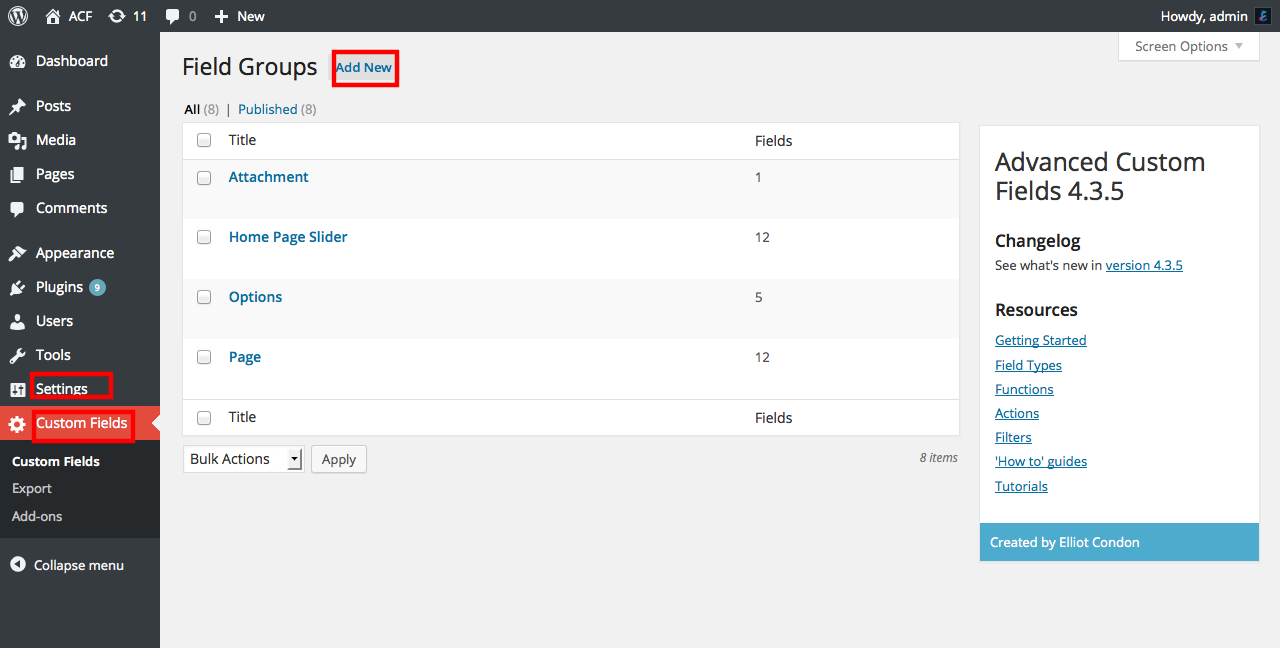
The plugin will now be visible under the “Settings” option in the menu. Click on it and on the screen that opens, select the “Add New” tab.
This will open a new page titled as “Add New Field Group”. Click on the blue “+Add Field” button located in the upper half of the screen.

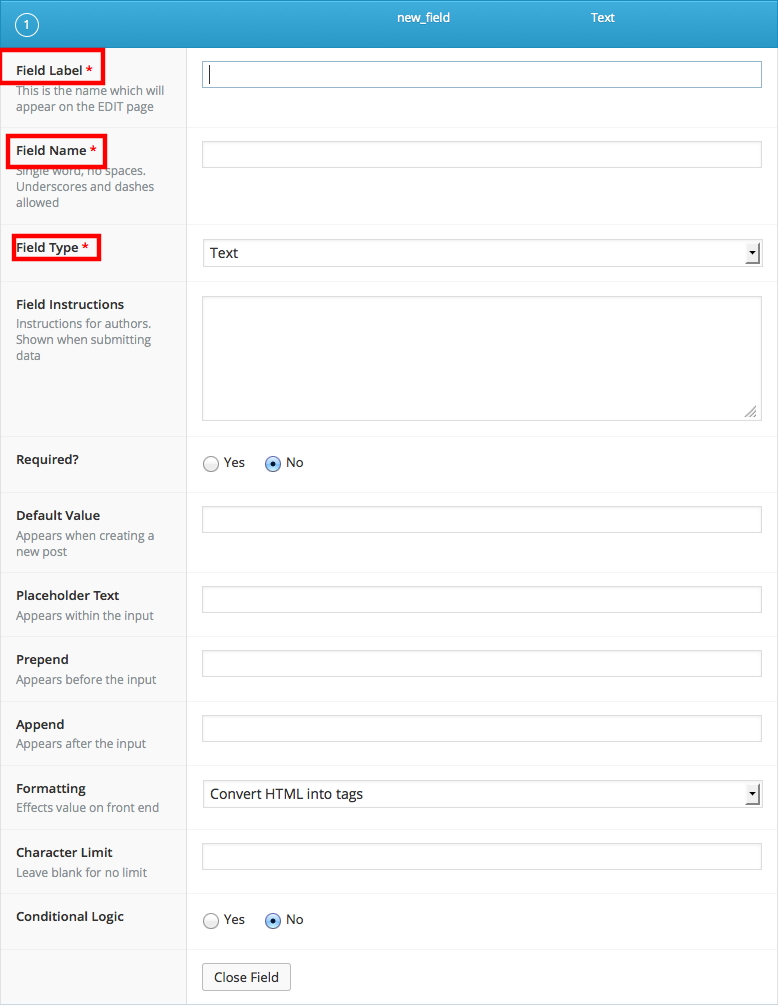
You will have to provide a title to the new field group. This title will be visible in the metabox on the edit page. Each field must be given a label, name, and type. There is no need to configure any other options shown in the image given below. They will automatically change according to the field type. Use uppercase and space while creating the label and small letters without spacings while composing the name.
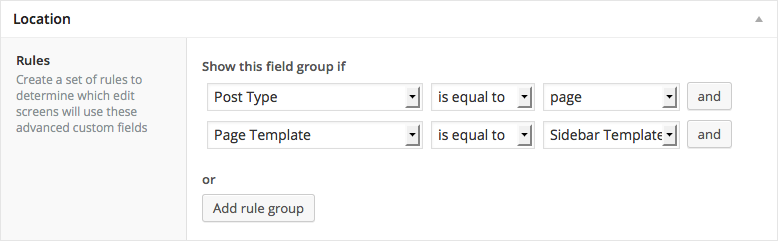
Step 3: Define Location Rules
In the next step of the process to create and display WooCommerce custom fields, we will define the location rules. These conditions will when and where the fields will be added to the edit page. Scroll down and go to the section called “Location”. Use “and” and “or” statements to create the “Show this field group if Post Type is equal to Product” condition. This will ensure that the new field will be visible on the Add/Edit WooCommerce product screen.
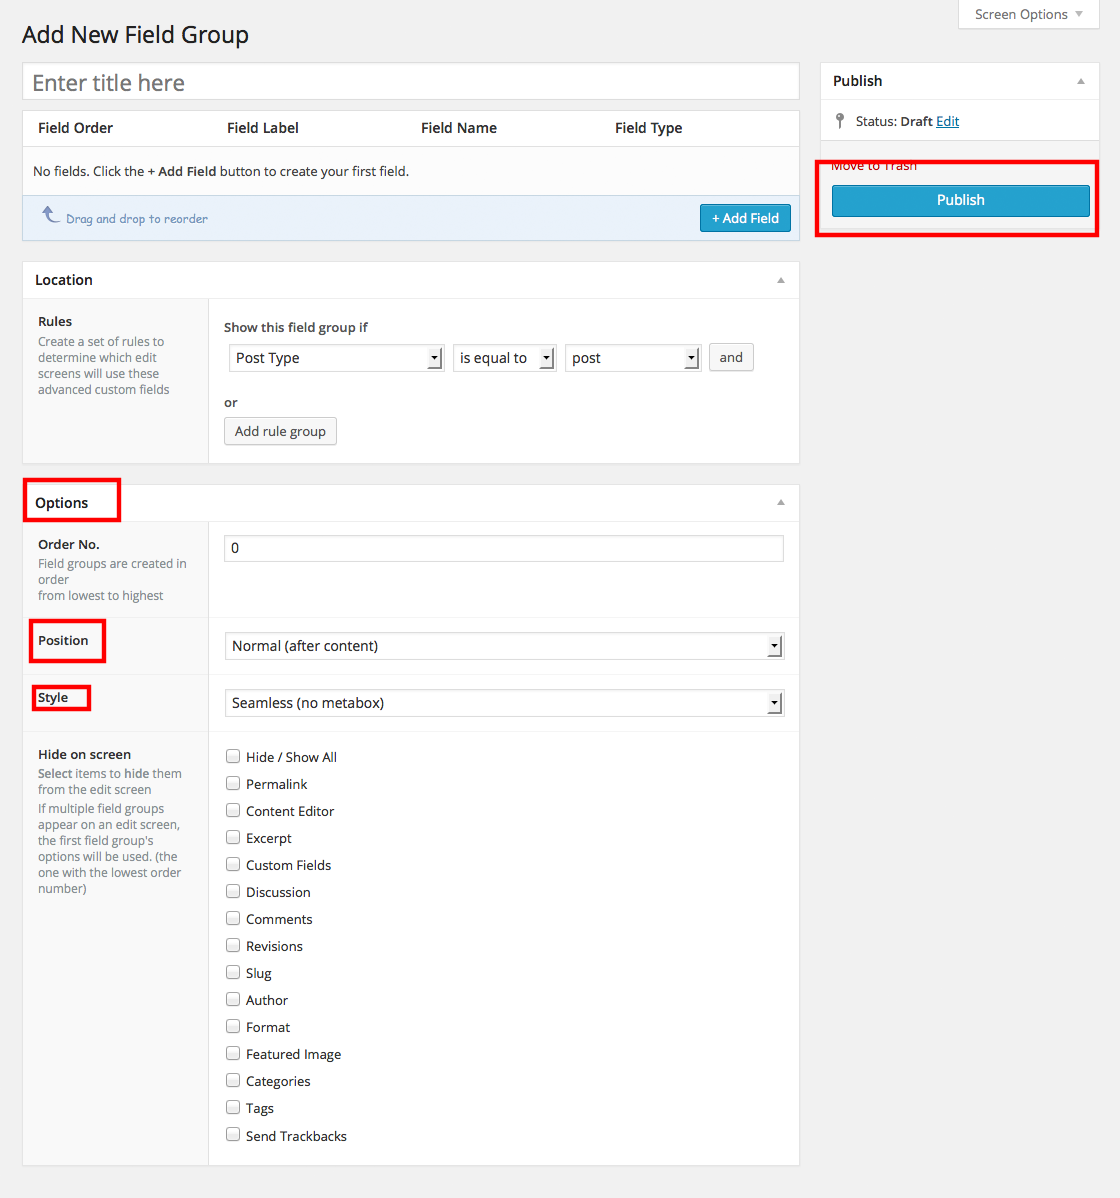
Step 4: Customize More Options
Scroll even further down and you will come across the “Options” section. Here you can conduct some additional modifications to alter the display of the field on the edit page. You can define the positioning of the new section. There are also various options to hide different elements and change the styling. Hit the “Publish” tab to complete the custom field creation process.
When you visit the edit page, you will find the new fields there. Add values to them and save the product.
B. Display WooCommerce Custom Fields On A Page
We will now execute the next phase of the procedure where the field will be displayed on a chosen page. The following steps will help us complete the process:
Step 5: Install The WooCommerce Product Table Plugin
We will need another plugin to display the field. Go to “Plugins> Add new” in the control panel and search for the WooCommerce Product Table plugin. Download and install it files on the interface. Activate it and move to the next step.
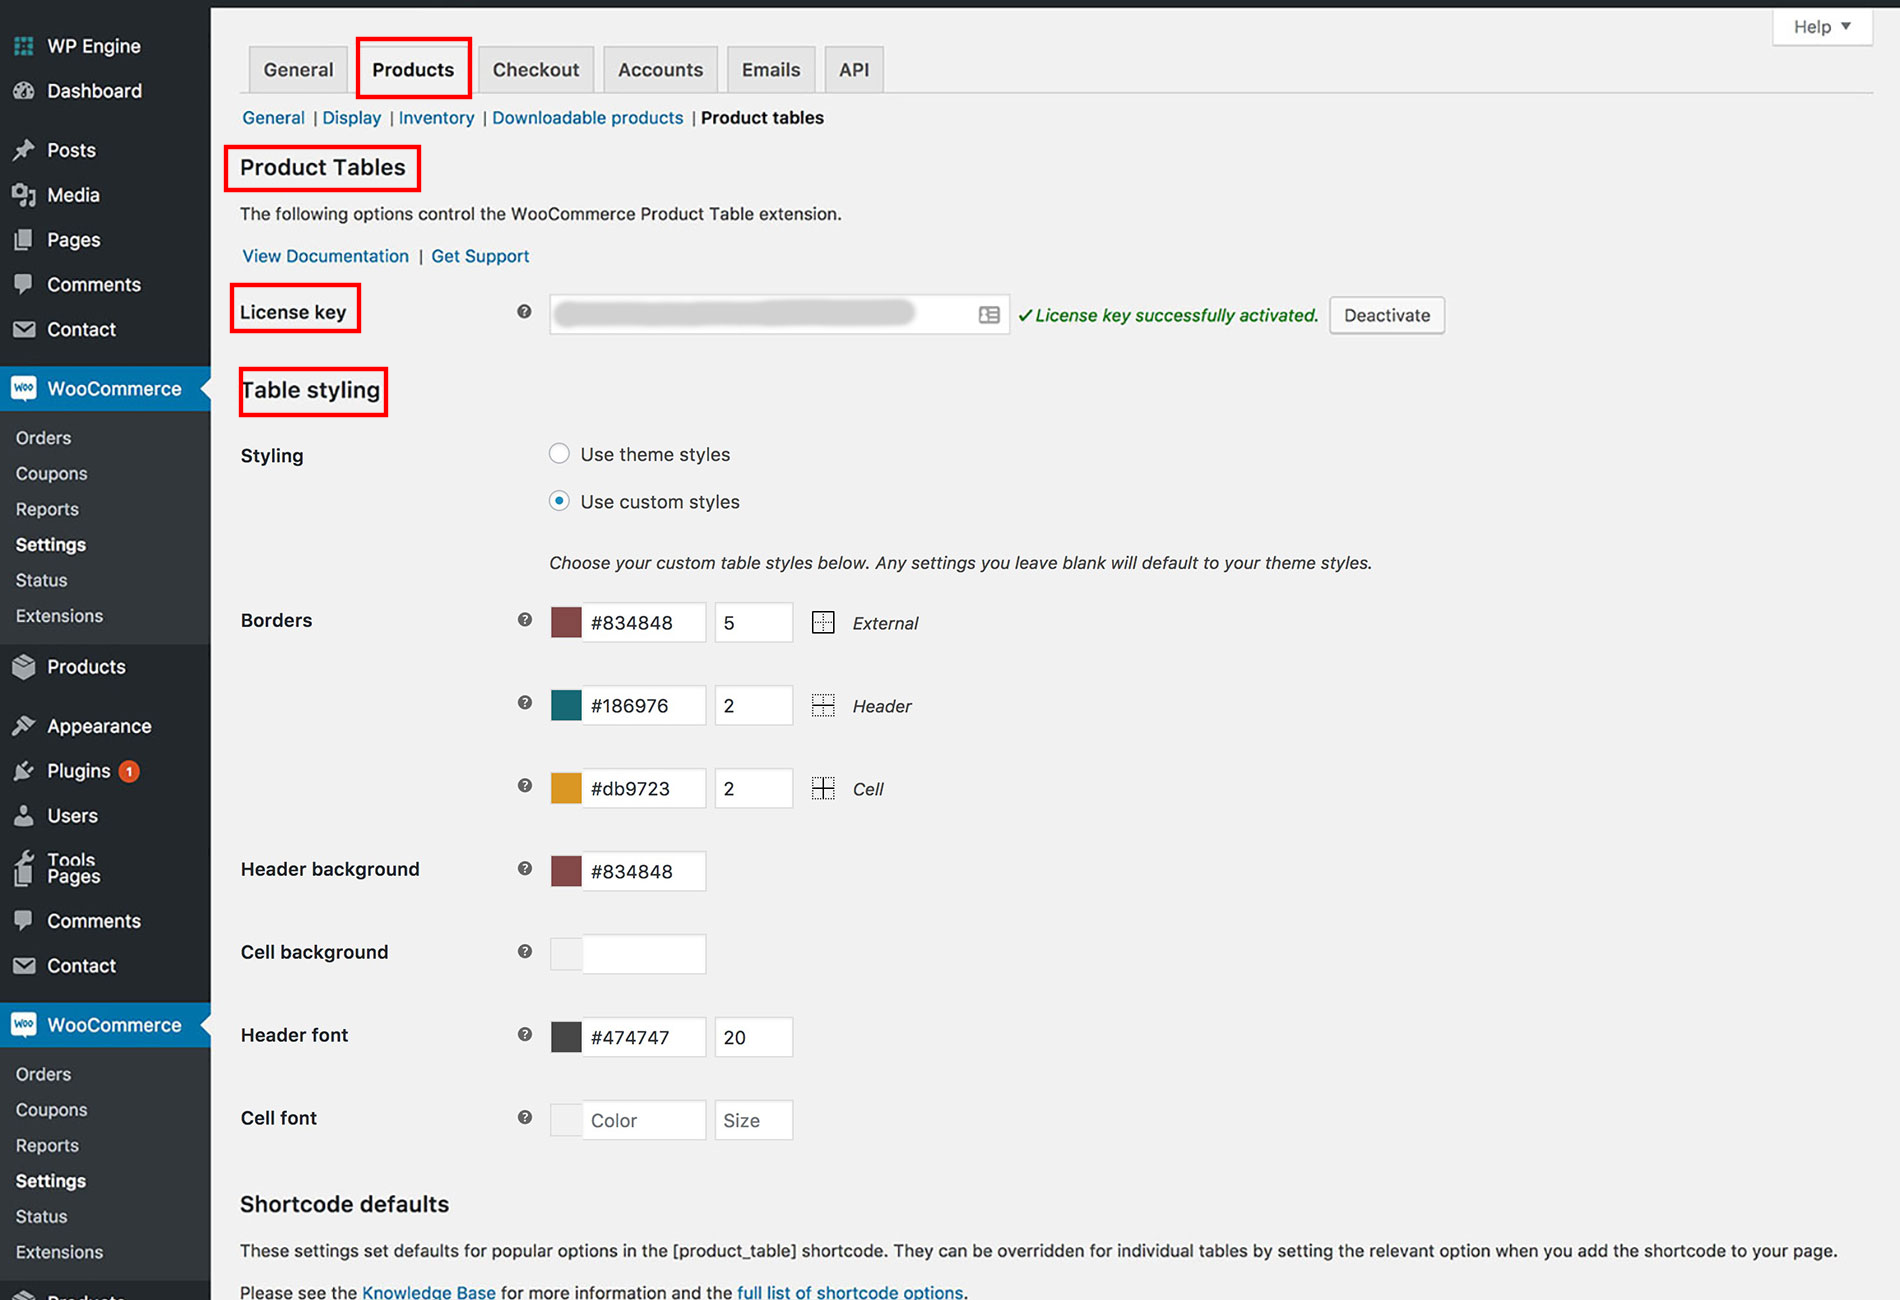
Step 6: Configure Product Table Settings
Locate WooCommerce in the menu on the dashboard. Click on it and open the “Settings” screen. Select the “Products” tab and go to “Product Table”. Enter the license key in the specified location. Modify the styling options according to the appearance of your store.
Go back to the edit screen of the website. List all the products on the store using the following shortcode:
[product_table]
The products will be visible now but you will have to choose the columns to display the custom field.
Step 7: Select The Necessary Columns
You will have to add the following snippet to the product table shortcode:
columns=””
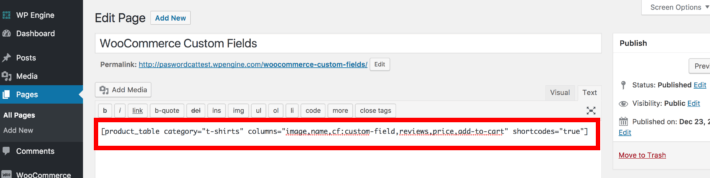
List all the columns between quotes. Include your custom field after inserting cf: as shown in the example given below:
[product_table columns=”image,name,cf:custom-field,reviews,price,add-to-cart” shortcodes=”true”]
This code will display a custom field called “custom field” along with price, revies, and add to cart options. Refer to the image given below to see how the code will look on the edit screen.
This helps to generate the result shown in the following picture:
Conclusion
This simple method to create and display WooCommerce custom fields which will be helpful to all kinds of users. It will be useful in displaying extra data about items on sale and improving customer engagement.
Author Bio:
Jacob Graves is a Sr. WordPress Developer at HireWPGeeks Ltd, a company that converts your website to WordPress in a convenient manner. He is a passionate writer and loves to share WordPress and SEO related tutorials.