
Use of real estate photo editing techniques radically raises the visual appeal of property listings and their sales potential. Real estate photography is a sensitive niche due to the transaction sums involved, and every real estate photographer has his or her own bag of tips and tricks to touch up the property listing images put on online and print catalogs.
Real estate photo editing is the first step taken to make a property sell faster and fetch a higher price. High-quality images edited by professional real estate photo editors get 118% more views on home listings, and sell 32% faster. Smart, well-done real estate photos are a must to catch the attention of potential customers. Balanced images showing rooms and exteriors from their most appealing perspectives, makes it easier for clients to picture themselves living there. But raw untreated property images can turn away even highly interested customers.
With 66% new property buyers being millennials and spending 60% of their time scrolling through property photos on listing sites – dull and flat images can quickly kill salability. Don’t forget it’s all about the visuals with Gen Z. But before we move ahead, let’s first understand why real estate photography editing is really crucial for MLS sites.
Table of Contents
Why real estate photo editing matters for MLS sites
90% of real estate property buyers visit an MLS site while searching for a property. They look for eye-grabbing properties and match prices to appearances. 79% of online home buyers on Zillow term viewing property photos extremely important to their home-buying experience. And of these, 35% of homebuyers make an offer on a home without seeing it in person.
Here are some reasons that make property image editing a must for MLS sites:
- Treating raw photos with professional editing and the best retouching techniques helps to post high-quality images
- Edited photos help the prospects visualize each property element properly, which interests them to purchase or invest
- For MLS sites, ensuring uniform settings and appearance of all properties is a crucial responsibility
- Well-edited images improve sales performance since they not only attract, but actually convert prospects
Post-processing of property images is no less challenging. Fortunately, you don’t need to be a professional photographer to capture high-quality images. Thanks to tools like Photoshop and Lightroom, average photos can come to life in the edit. A proven set of image editing techniques can thus help in not just producing gorgeous property photos, but also to optimize time. Here are the top 7 photo editing techniques, which can radically improve your property images.
What are the top 7 Property Photo Editing Techniques?
In a study done by Zillow, they found 22- 27 property images are ideal to showcase a property. Properties with less than nine images are 20% less likely to be sold within two months, whereas properties with more than 28 images sold like hotcakes. The number of property photos to be edited for a single assignment requires experts with hands-on experience in applying real estate photo editing techniques. So, here are some real estate photo editing tips for you to leverage tools like Adobe Photoshop, which will help you fill the experience gap.
1. Resizing, cropping, retouching, and straightening property photos
Property image size makes a difference and so resizing matters. When images affect the page load speed of your website, you downsize them. But when your target is to improve Pixels Per Inch (PPI), you upsize an image. Cropping property images helps in achieving a fair aspect ratio, i.e. the dimensions of the sides and helps you make up for composition errors. You cut off the side of the images, because either it distracts property buyers, or doesn’t fit into the window.
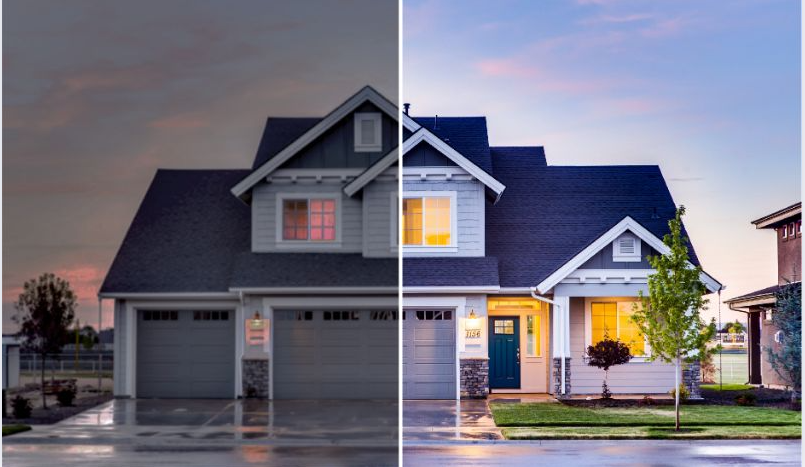
Your property images transform when you retouch them. Well, retouching is a broad term and will involve different steps (contextually discussed in the below part). Look at the image below; right from achieving perfect exposure, enhancing colors, adjusting lights, the clarity has been improved. Altogether, retouching exposes each minute detail in its most appealing version.
Uneven, lopsided property images can distract potential buyers. To mend such unprofessional images, apply vertical and horizontal straightening.
To correct the distortions, we can use Photoshop as described below.
- Select Perspective Crop tool from the Crop tool and then create a marquee around the distorted item. Ensure that the marquee edges match the rectangular edges of the item. When done, we get the correct perspective.


2. Removal of unwanted camera flash and objects like furniture, tree, etc.
In property images that are captured in dark settings, flash causes reflection in excess.
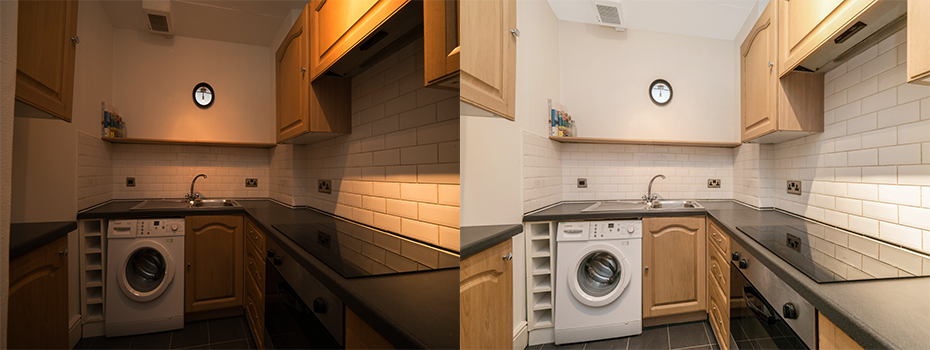
One can leverage Photoshop capabilities like the Lasso tool, Clone Stamp tool, Brush tool, etc. to overcome this issue. In the image below, the flash effect which had rendered some portions extra bright, and some portions dark has been rightly adjusted to produce a natural setting.
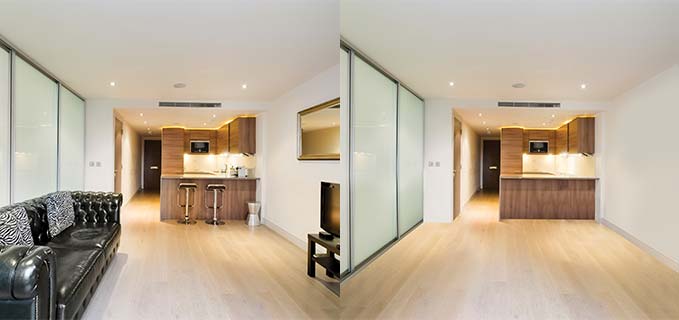
Objects like furniture etc. may keep your property behind if property photos project them while preventing a complete view. Check out the difference in the below image.
Here’s how you can use the Clone Stamp tool in Photoshop to remove unwanted objects.
- From the Brush menu, choose the Clone Stamp Tool
- Pressing the Alt key, click the portion of the picture you want to deploy as a sample – in this case, floor with wooden texture.
- Bring the cursor over the intended objects (here, sofa, table, and television).
- Start brushing over the object and check if the effect matches the sample. If not sample again till you get the desired effect.
3. Color balancing/adjusting unnatural colors and removing unwanted tints of colors
Poor light settings or adjustments cause issues of color balance or infuses unnatural colors in the image. Formation of color casts takes place in such cases as can be seen in the image on the left-hand side below.
While white balancing will allow you to achieve natural atmospheric settings, use “Level Adjust Layers” in Photoshop to adjust excessively dark orange hues. Here is a process in brief:
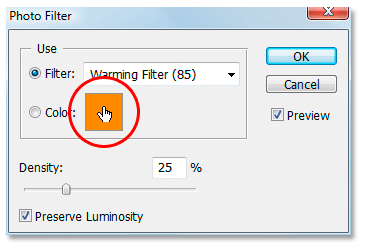
1. Add a photo filter adjustment layer by selecting “New Adjustment Layer” followed by Photo Filter from the list of Adjustment layers.
2. Next, from the Photo Filter dialog box, select the color you intend to remove. The color swatch will move you to Color Picker.
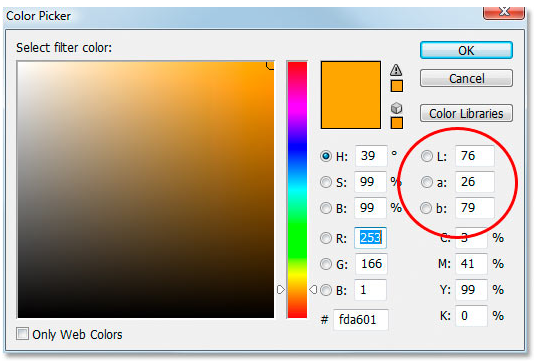
3. In the Color Picker adjust the settings for the exact Color, while also adjusting hue and saturation. This will give you the final output.
4. HDR photo merging/photo stitching
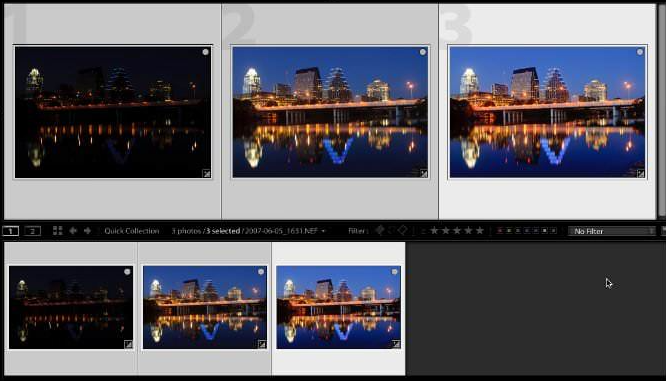
Your images must be excellently illuminated not just for appealing prospects but also for converting them into customers. Below, on the left side, there are four images with different exposures and settings. On the right side, the images have been merged to produce a well-illuminated HDR image.
Let’s check out how to use HDR merge using Lightroom:
- Select all the images you want to merge. Here we have selected images 1, 2, 4, and 5.
- For merging, go to Photo Menu, from there select Photo Merge, and click on HDR.
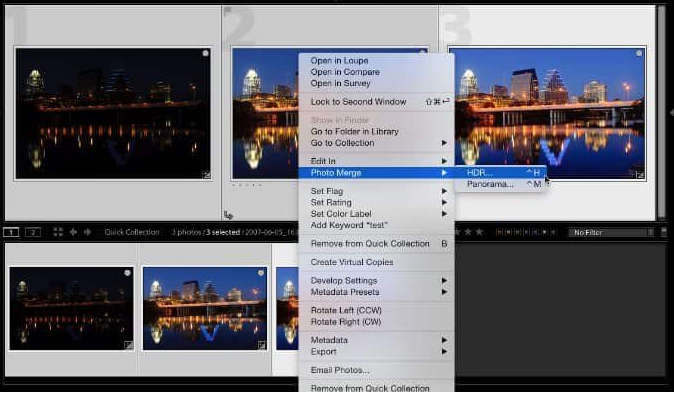
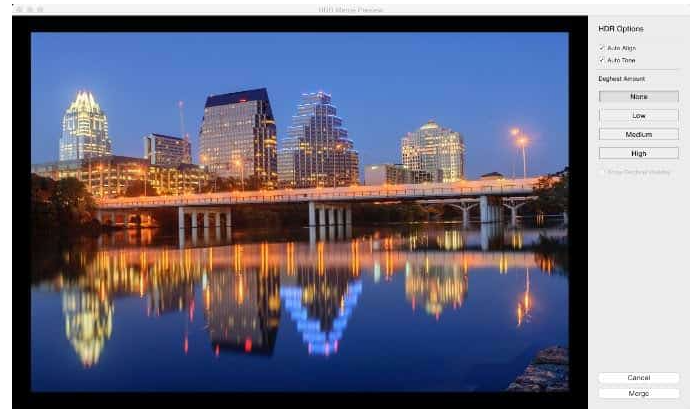
- You will get the image with Auto Tone and Auto Align. The default value for Deghost Amount is None. You can select the desired value.
- Once you are done selecting options, press the Merge button on the bottom right-hand side.
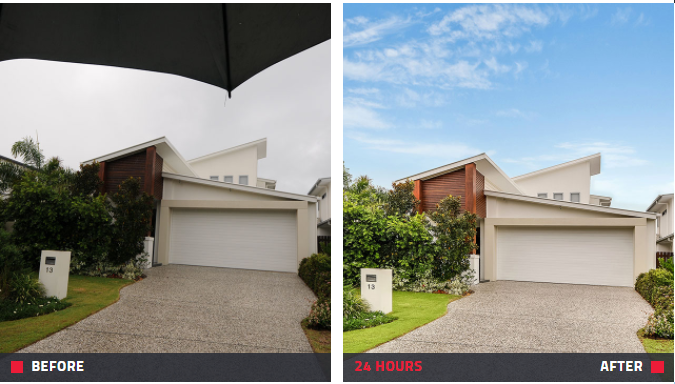
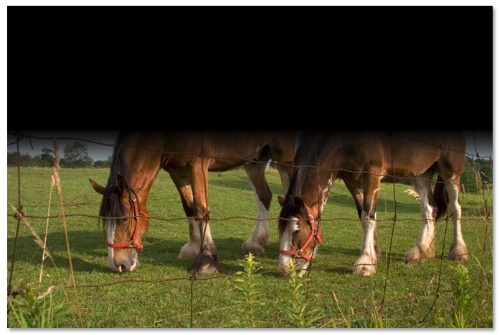
5. Sky enhancement and sky perspective correction to enhance property outdoor photos
Outdoor property images need a good sky appearance, as dull, dark, and blackish sky can easily dissuade buyers. The following illustration helps us understand the difference. Sky enhancement therefore matters.
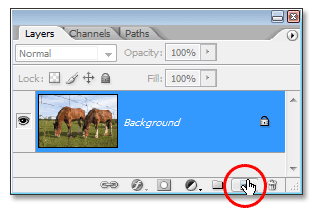
Here is how we can do sky enhancement using Photoshop:
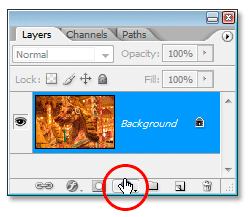
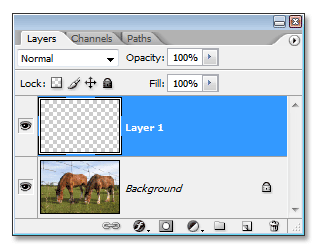
- Add a blank layer using the New Layer option
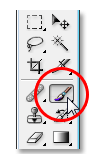
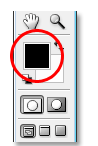
- Set the foreground color to black and the background color to white, following which you should select the Gradient tool.
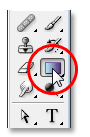
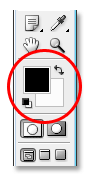
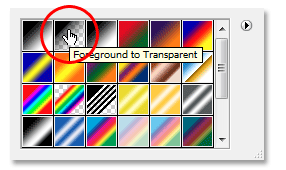
- Ensure that you make the foreground transparent through Gradient Picker.
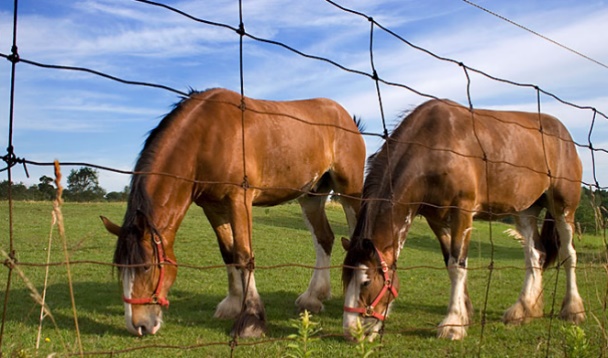
- With Layer 1 selected, drag the black-to-transparent gradient in the portion of Sky, which fills the sky portion with black.
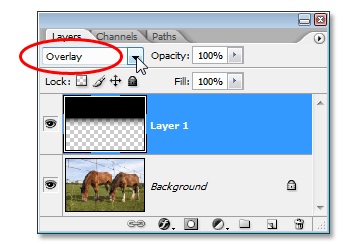
- Next, select Overlay from the drop-down menu for the blend option. This will enrich sky appearance, improve the contrast, and expose the details better.
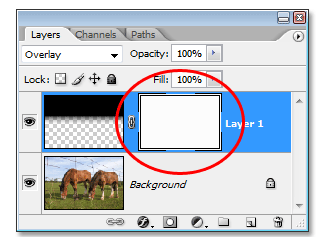
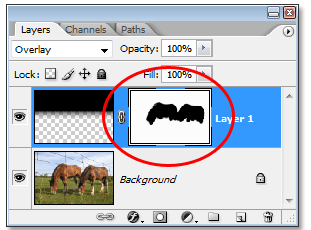
- But the gradient may unnecessarily affect the appearance of the main objects, so we will add a layer mask to Layer 1.
- Now to protect the areas from the gradient effect, we will use the Brush tool.
- We want to paint the main objects black, so we will have the foreground color set to black.
- Using the Brush tool, we will paint over the desired areas (in this case horses, in case of properties all house components). The objects painted in black will be highlighted in the Layer Palette. The main objects will be highlighted as:
Look at the final result.
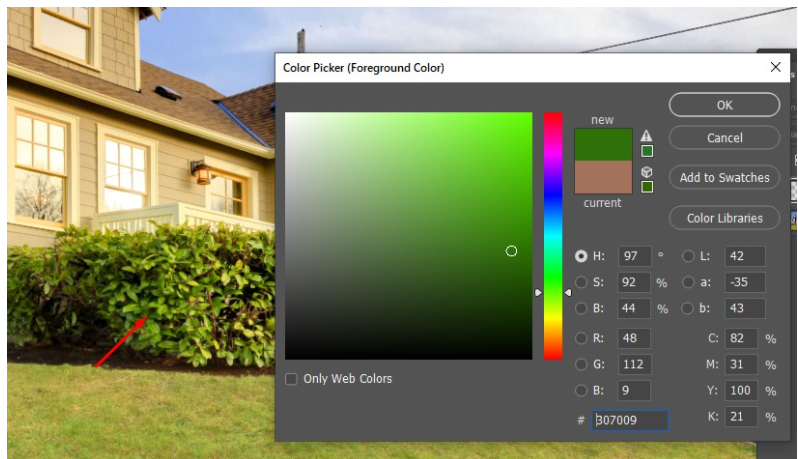
6. Lawn enhancement/ repairing a lawn
Lawn enhancement refines the external appearance of your property and enhances the curb appeal. A brown lawn may be a potential cause of your property remaining stagnant and so lawn enhancement becomes important.
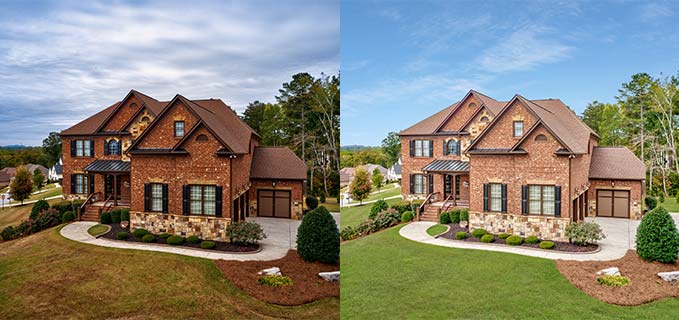
Here, we will understand how to use Photoshop to turn faded lawns to lush green.
- Once you select the image, from the Adjustments panel select the Hue/Saturation option.
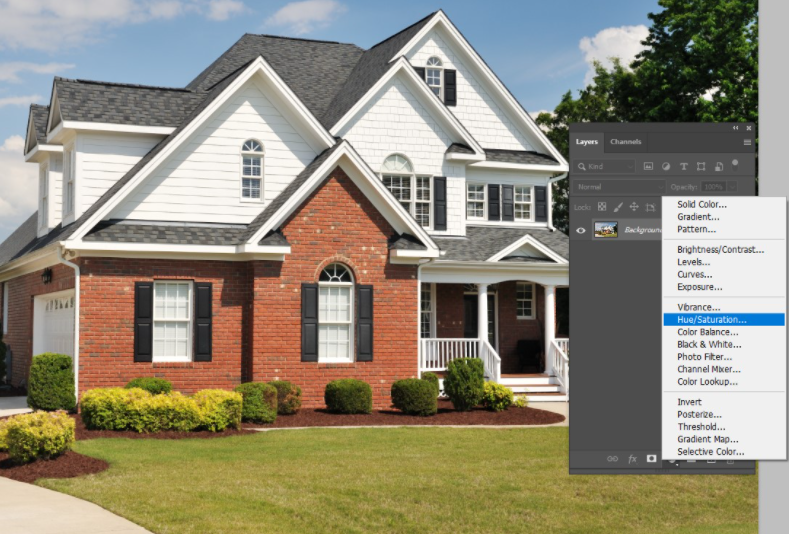
- Adjust Hue, Saturation, and Lightness settings to achieve desired brightness. Select Yellow color and keep the values as illustrated below. Of course, you will have to experiment with these values based on the shade you intend to achieve.
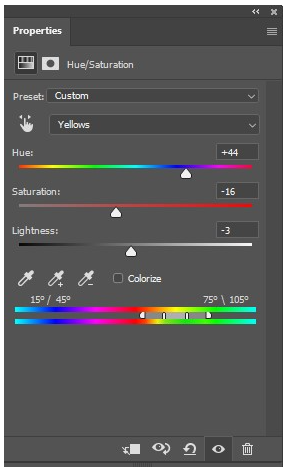

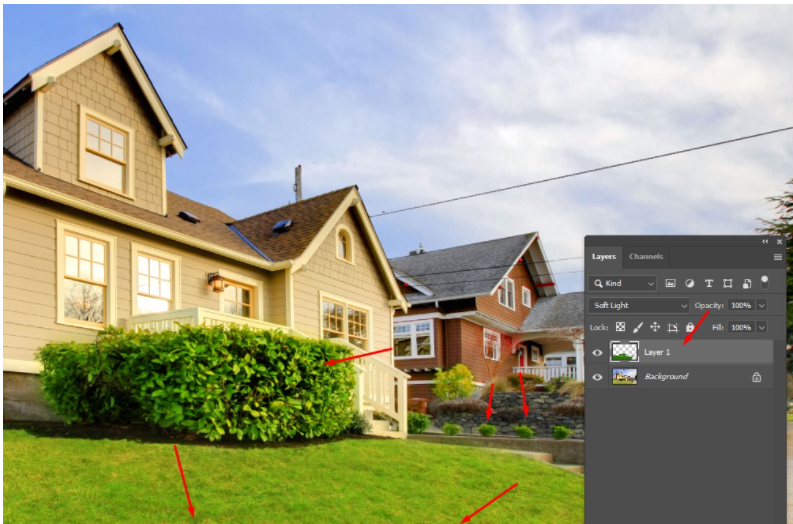
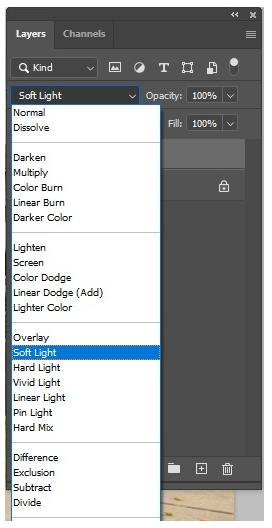
- You can also leverage brushes for formatting lawns. Just set the blending mode to a proper value. Set the desired green shade tone and start painting. The following three screenshots offer a pictorial illustration.
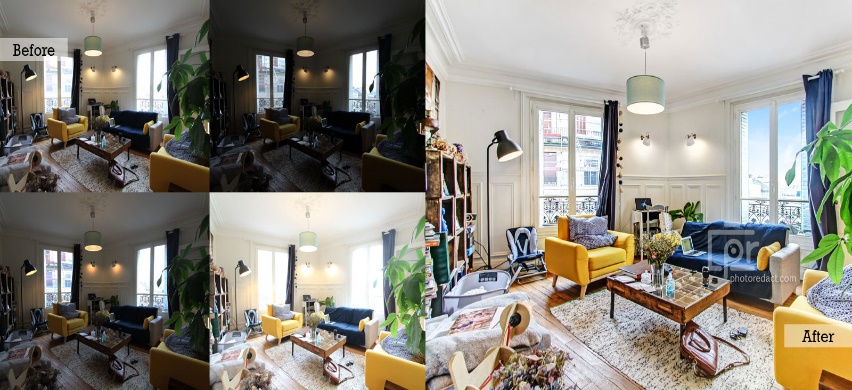
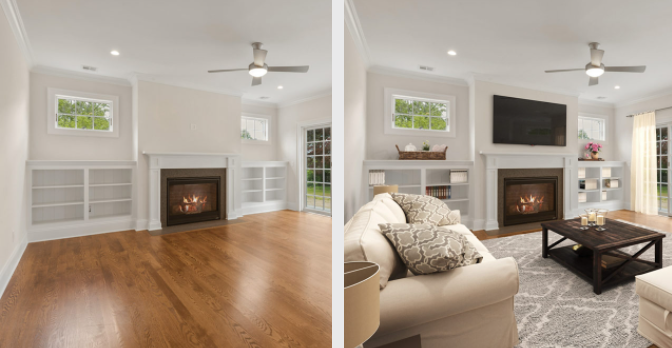
7. For digital staging add furniture to real estate photos
Virtual staging is the new norm for MLS sites, as it adds the required charm to the indoor of your house. Below is a representation of how adding plush couches and stylish décor renders the required sophistication that may enhance your property’s worth.
Virtual staging is enabled by specialized applications like RoOomy, iStaging, Homestyler, etc. These tools add anything right from beds and sofas to wall hangings and television.
Software like VisualStager comes with around four thousand furniture items. You just have to select the best suitable furniture and drag it to stage your property image. It provides the option to share the images in JPEG format and also overcloud. Here is a sample of VisualStager.
What futuristic image editing services can help MLS sites?
Image editing is witnessing rapid developments. From exposing different angles of a property to moving to virtual staging, now it is moving to augmented reality. The AI-based techniques, however, may not be easy for MLS sites to implement. So, seeking the assistance of professional image editing services can help them to capitalize on these advancements in technology.
Being experts, real estate photo editing and retouching service providers will apply AI-based modifications in photo editing applications in a faster and better manner. This will help MLS sites to completely transition from 2D images to 3D visualizations. And augmented reality-based virtual tours are already being preferred by customers for the realistic and informative experience they can receive at their own pace without an in-person visit to the property.
Conclusion
By using the right set of image editing techniques, you can keep the portfolio of your property images in top form. But to do that, based on the photo editing application, you will have to develop SOPs to implement the techniques we have discussed here.
Property image editing is indispensable to MLS and with new dimensions emerging, like virtual staging, mere reliance on one specific tool won’t help. You will have to explore multiple digital staging applications, to understand which one suits your needs the best.
The best way to keep up with the trend is to engage with a photo editing specialist like Hitech BPO. And something we cannot ignore is that when faced with large-scale operations, 70% of photographers find real estate picture editing to be a boring and monotonous task. Here, outsourcing can be a lifesaver as specialized real estate photo editing service providers can reduce 60% of image editing expenses, generate 3x detailed vies, and result in 2x actionable leads.
Author Bio:
Snehal Joshi spearheads the business process management vertical at Hitech BPO, an integrated data and digital solutions company. Over the last 20 years, he has successfully built and managed a diverse portfolio spanning more than 40 solutions across data processing management, research and analysis and image intelligence. Snehal drives innovation and digitalization across functions, empowering organizations to unlock and unleash the hidden potential of their data.

Incredible blogs! I read your comments its very fantastic and aggregate concept for all of us